Are you looking for a DAW that turns your musical ideas into reality? Discover the powerful capabilities of a Digital Audio Workstation, the go-to solution for recording, editing, and producing music on your computer. With this article, you’ll navigate the features of the best DAWs and find which one aligns with your music production journey.
Key Takeaways
- DAWs have revolutionized music production by allowing artists to record, edit, and produce music using sophisticated virtual studio software. Popular options include Cubase for professional studios and FL Studio/Ableton Live or ProTools for electronic music producers.
- A DAW’s core components encompass a user interface with transport/mixer controls and waveform displays, audio and MIDI tracks for recording performances and performance data, plus mixing tools and effects for sound manipulation and enhancement.
- The choice of a DAW should align with an artist’s production goals, genre specialization, and budget, with options ranging from simple, free versions to advanced, professional-grade software. Additionally, the evolving DAW market continuously introduces new features and updates.
Table of Contents
Decoding the Digital Audio Workstation (DAW)
Anatomy of a DAW: Core Components Explained ->
Recording Audio with a DAW: A Step-by-Step Guide ->
Freeing Creativity with Virtual Instruments ->
Music Production Beyond Recording: Advanced DAW Capabilities
Selecting the Best DAW for Your Needs ->
Transitioning Between DAWs: Importing and Exporting Projects ->
From Studio to Stage: DAWs in Live Performance ->
The Evolution of DAWs: Looking Back and Ahead ->
Navigating the DAW Marketplace: Latest Version Updates and Trends
Summary
FAQ
Decoding the Digital Audio Workstation (DAW)
Ever wondered how your favorite tracks are crafted?
Enter the Digital Audio Workstation. A DAW is essentially a virtual recording studio, a software application that facilitates the recording, editing, and producing of music on a computer. Over time, DAWs have evolved from simple software to sophisticated tools, capable of emulating the acoustics of traditional recording studios. They offer artists:
- An unlimited number of tracks
- A wide range of effects
- The ability to mix and master their music
- The ability to collaborate with other musicians remotely
With a DAW, artists can break traditional studios’ physical and financial barriers and create professional-quality music from the comfort of their homes.
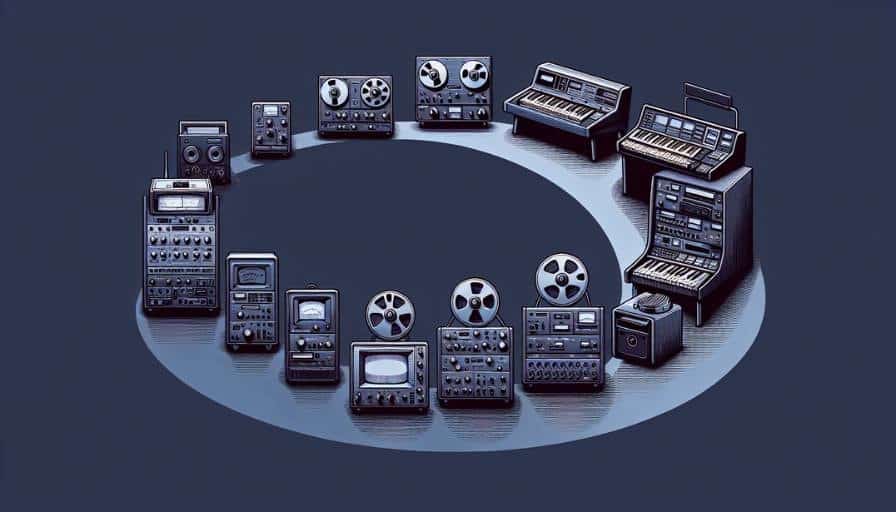
The advent of DAWs signaled a transition from tape-based recording in traditional studios to software-driven systems. This revolution hinged on the use of computers in the production workflow, thereby enabling precision and flexibility that were impossible in the analog era.
Today’s DAWs offer a suite of tools to create music, from multitrack recording to virtual instruments and automated mixing capabilities. They provide musicians with an environment that replicates a traditional mixing console, complete with sliders, knobs, and buttons, all controlled with a mouse, keyboard, or an external MIDI controller.
DAWs like Cubase have become industry standards in professional recording studios, while others like FL Studio and Ableton Live have gained popularity among electronic music producers. The latter is especially favored for its loop-based composition features, which allow producers to experiment with different song structures and tweak levels using mixing tools.
Hence, whether you’re recording an acoustic guitar or producing a complex electronic music track, there’s a DAW tailored to your needs.
Anatomy of a DAW: Core Components Explained ->
Having introduced what a DAW is, it’s time to dissect its anatomy. Much like a complex organism, a DAW is composed of several key components, each serving a specific function in the music production process.
To help you navigate this virtual studio, we’ll break down these core components, from the interface to audio and MIDI tracks, and the mixing tools that allow you to craft your unique sound.
The Interface: Navigating Your Virtual Studio
For a producer, the DAW’s user interface operates as a control center, from where you can manage your:
- Audio Tracks
- MIDI Tracks
- Virtual Instruments
- Effects
Much like the flight deck of an airplane, DAW interfaces are developed with a level of complexity and functionality that can rival advanced software such as Adobe Photoshop. This design accommodates the intricate tasks involved in music production, from basic recording to complex sound design.
DAW interfaces are laid out based on the metaphor of a multitrack tape recorder, incorporating standard elements such as:
- Transport Controls (play, rewind, record buttons)
- Track Controls (adjust gain, equalization, stereo panning)
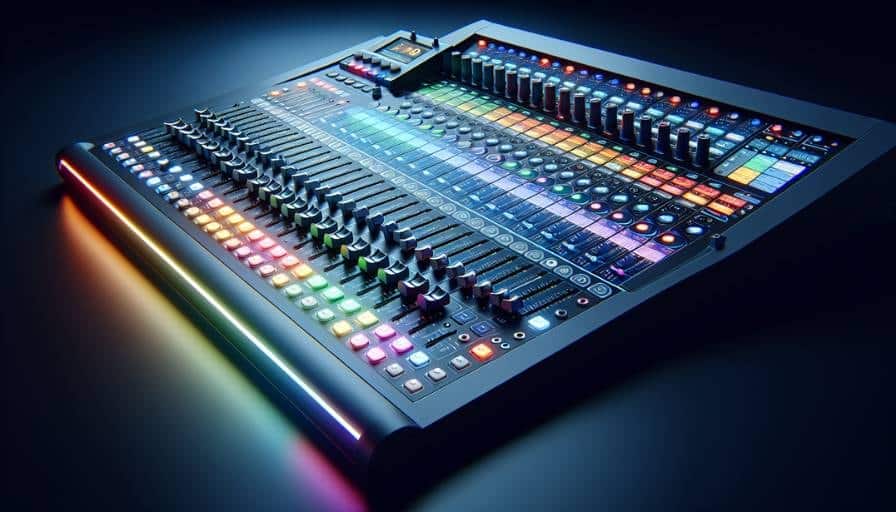
- Mixer Interface (emulates mixing desk in analog studios)
- Waveform Displays (visual representation of audio signals)
This design makes it easy for those familiar with traditional tape recorders to navigate the digital landscape, especially when dealing with digital audio files and digital audio recording.
The waveform displays also enable precise editing and manipulation of audio clips.
Let’s now understand something more.
Audio Tracks and MIDI Tracks: Laying the Foundation
Navigating your virtual studio, you’ll come across two primary types of tracks: Audio and MIDI.
Audio tracks in a DAW serve to record the sound of an actual live performance, capturing the unique textures of a soulful vocal or the resonant strum of a guitar.
On the other hand, MIDI tracks capture not the actual sound, but the performance data, such as the notes played, their velocities, and durations. In other words, if audio tracks are the canvas and the paint, MIDI tracks are the blueprint.
In DAWs, both audio and MIDI tracks can be manipulated using various tools such as volume adjustment, panning, and effects application. These manipulations are all part of the DAW’s track controls. However, MIDI tracks offer extensive editing capabilities such as quantization, transposition, and velocity adjustments, which do not apply to audio tracks.
This is where the analogy of a “baked cake” comes in.
While audio tracks are like a baked cake where elements cannot be individually altered after recording, MIDI tracks are like the recipe, allowing for the modification of each ingredient during the composition process (even though nowadays, some software can extract elements from a stereo file like Spectralyaers).
One of the key advantages of DAWs is their ability to handle an almost infinite number of audio and MIDI tracks. This allows for complex compositions and arrangements that far exceed the capabilities of traditional recording mediums. MIDI recording, unlike audio, captures the actual performance notes, allowing for detailed editing such as changing instrument sounds and adjusting timing after the performance has been recorded.
This makes MIDI tracks an incredibly flexible tool in the music production process, bridging the gap between traditional musical expression and digital music production.
Mixing Tools and Effects: Shape Your Sound
After recording your tracks, shaping your sound is the next step, facilitated by the mixing tools and effects. DAWs provide dynamic control in mixing through the automation of track parameters, panning to shape the stereo field, volume level adjustment with faders, and tonal shaping with EQs and compressors.
These tools allow you to create a balanced and cohesive mix, where each instrument and vocal line finds its place in the sonic landscape.
To further enhance the sound quality of your mixes, DAWs offer a range of audio effects such as delay to create echoes, saturation to add warmth and character, and reverb for space simulation. Additionally, DAWs offer a variety of built-in effects, such as compression, EQ, reverb, and others, that can be applied non-destructively to individual tracks or the entire mix.
The use of audio plug-ins, such as VST plugins, expands the range of available effects and processing tools, allowing you to customize your sound according to your creative vision. As a result, the possibilities for sound manipulation in a DAW are virtually limitless, offering you the toolkit to craft your unique sonic signature.
Recording Audio with a DAW: A Step-by-Step Guide ->
Having covered the core components of a DAW, we will now delve into the step-by-step procedure of recording audio. Whether you’re recording a vocal line or a guitar riff, understanding how to set up your audio interface, capture high-quality audio recordings, and edit audio waveforms is essential.
Let’s explore each of these steps in detail.
Setting Up Your Audio Interface
Setting up your audio interface is a prerequisite before hitting the record button. This device is the bridge between your instrument or microphone and your computer, capturing analog audio signals and converting them into digital data for processing in a DAW.
To set things up, you need to connect your audio interface to your computer using the correct digital cable like USB or Thunderbolt. Also, ensure the power supply is connected… Naaa! Really 😁 ?
Once you’ve established a physical connection, it’s time to install the audio interface drivers or any necessary software provided by the manufacturer.
This step ensures proper communication with your computer’s operating system. After the drivers are installed, you need to set up the audio interface as the primary audio device in the DAW’s system preferences. This will enable it for recording and playback.
Finally, connect your microphones, instruments, studio monitors, and headphones to their respective jacks on the audio interface. For the best sound quality, use balanced cables for the studio monitors to preserve signal integrity.
If you like to understand something more regarding Digital Signals and how to properly set up an audio interface, have a look at this course: Acoustic, Analog, and Digital Signals Explained.
Capturing High-Quality Audio Recordings
Once your audio interface is set up, capturing high-quality audio recordings is the next step.
However, achieving optimal audio quality during recording sessions requires more than just hitting the record button. You must consider aspects like the recording environment, audio levels, and the type of cables you use.
Before you start recording, select the correct input type on the interface to match the source you’re recording, such as a microphone, line, or instrument level. Use balanced audio cables (XLR or TRS) to connect the interface to studio monitors. This helps to maintain audio signal integrity and reduce noise.
Next, set the input volume or sensitivity appropriately on your audio device.
This ensures the microphone captures your voice at a consistent and clear level without distortion or background noise. Monitor audio levels visually using the input level meter in your DAW or audio settings, and adjust the input volume if levels reach the end of the meter’s length.
Choosing an environment with minimal background noise is also crucial. Close windows, doors, and air conditioner to your workspace and notify others to minimize disturbances during recording sessions.
Lastly, listen back to short test recordings to confirm the audio quality and make necessary adjustments to input levels, microphone placement, and environmental controls before proceeding to record audio in full recording sessions.
Audio Editing Made Easy: Cut, Copy, Paste
After capturing your audio tracks, perfecting them through editing is the subsequent step.
Audio editing within a DAW is a fundamental aspect where changes can be made to audio waveforms in a non-destructive manner. This means you can manipulate the audio without altering the original recordings.
DAWs offer a range of features and tools to help you edit and manipulate audio. Some of these include:
- Cut, copy, and paste audio regions using a clipboard system similar to word processing
- Precise editing tools like snap-to-grid for alignment
- Automatic fades and crossfades to smooth transitions between audio clips
These features allow you to edit audio without altering the original recordings and create professional-sounding tracks.
For complex sessions, DAWs allow you to group tracks or regions. This enables simultaneous editing of multiple parts, ensuring consistent treatment across tracks.
Freeing Creativity with Virtual Instruments ->
Having mastered the basics of recording and editing audio, it’s time to venture into the world of virtual instruments. These are software-based replicas of traditional musical instruments, including:
- Pianos
- Guitars
- Synthesizers
- Drum machines
Virtual instruments not only expand your sonic palette but also open up endless possibilities for creativity.
Let’s explore how you can control these virtual instruments, expand your sound palette, and integrate third-party plugins to elevate your music production game.
Controlling Virtual Instruments with Digital Audio Workstations
MIDI controllers are used to control virtual instruments in a DAW.
These come in various forms such as keyboard controllers, drum pads, and control surfaces. They serve as the primary interface for controlling virtual instruments in a DAW. By providing physical controls like knobs, sliders, and drum pads, MIDI controllers bring an element of expressiveness and dynamic interaction to the digital realm. This facilitates nuanced performances with virtual instruments, adding a human touch to your digital compositions.
The setup of MIDI controller settings and mapping of controls to various DAW functions enables musicians to:
- Establish personalized workflows
- Optimize their control setups for enhanced creativity and efficiency
- Control virtual instruments within a DAW for detailed recording and fine-tuning of musical performances
This bridges the gap between traditional musical expression and digital music production.
Expanding Your Sound Palette with Software Instruments
In the digital realm of DAWs, the spectrum of sounds is limitless.
From the strum of a vintage electric guitar to the punchy bass of a Moog synthesizer, you can emulate an array of sounds using software instruments. The best digital audio workstations like Cubase Pro, Logic Pro, and Studio One offer an extensive library of virtual instruments.
These allow producers to emulate an array of sounds, including:
- Drum machines
- Orchestral instruments
- Synthesizers
- Electric guitars
With these software instruments., the possibilities are almost endless
But the selection of software instruments isn’t just about the sounds you can create. It’s also about how those instruments supply your unique creative needs. For producers interested in electronic and synthesized music, DAWs like Cubase Pro, Ableton Live, and FL Studio are equipped to support the needs of this genre with impressive arrays of virtual instruments and beat-making tools.
Similarly, if you’re into creating rhythm sections, SoundBridge, Serato Studio or Akai offers an MPC-style drum sampler/sequencer and supports various VST plugins.
Integrating Third-Party Plugins
Despite DAWs being equipped with a myriad of built-in virtual instruments and effects, there may be instances where you require a specific sound or function that is not available in your DAW. This is where third-party plugins come in.
These are software add-ons developed by other companies that can be installed into your DAW to expand its capabilities.
To utilize third-party plugins, users must first install the plugin, and then designate the correct folder in the DAW’s settings for scanning the plugin files.
For Mac users, VST plugins are usually installed to “UsersusernameLibraryAudioPlug-insVST”, and for Windows users, they are often found in “C:Program FilesVstplugins”.
If your DAW isn’t recognizing the plugins, there are a few strategies for troubleshooting. These include verifying the correct directories in the plugin settings, managing blocklists, ensuring 64-bit compatibility, running the DAW as an administrator, or using bridge utilities for 32-bit plugins.
Music Production Beyond Recording: Advanced DAW Capabilities ->

While excelling at recording audio and controlling virtual instruments, DAWs provide much more.
If you’re looking to dig deeper into the world of music production, DAWs provide advanced features that let you edit MIDI data, design unique sounds, and mix and master your tracks to perfection.
Let’s explore these advanced capabilities, which take your recording music production beyond simple recording and help you produce music more effectively.
MIDI Editing and Sequencing
In the digital realm of DAWs, MIDI (Musical Instrument Digital Interface) plays a crucial role. MIDI sequencing in DAWs is utilized for:
- Creating and editing MIDI data to control virtual instruments and synthesizers
- Enabling transmission on over 16 channels
- Providing a range of 128-note numbers for musical pitches
- Offering velocity values from 0 to 127 for dynamic expressions.
The MIDI protocol is essential for musicians and producers working with digital audio workstations.
Using MIDI, various parameters such as volume, pan, and program changes can be precisely controlled, allowing for detailed music creation and sound diversification.
MIDI data is compact and conserves system resources in a DAW, proving an effective method for sharing and editing musical arrangements. Moreover, modern DAWs feature advancements in MIDI editing like Steinberg Cubase, with native support for new hardware and intelligent MIDI tools.
Sound Design and Audio Processing
For those aiming to create distinctive sounds, DAWs offer a plethora of tools for sound design and audio processing.
Advanced editing tools in DAWs enable tasks like finding transients for drum editing or using strip silence features to separate desired audio from background noise.
Furthermore, artificial intelligence is now being integrated into DAWs, providing features like smart mixing assistants and automatic mastering services.
The future of DAWs also points towards more cloud-based solutions. Thin client VSTs are utilizing cloud server resources to reduce the workload on local systems, thereby enhancing application performance. These powerful tools and features open a world of possibilities for sound design, allowing you to create and manipulate unique sounds that breathe life into your productions.
Mixing and Mastering: Final Touches
Once you have your tracks recorded and your sounds designed, it’s time for the finishing touches – mixing and mastering.
This final stage of the music production process is where DAWs truly shine. They provide a suite of mixing and mastering tools equipped with high-quality audio effects, helping producers manage frequency issues, create spatial clarity, and provide consistency across tracks for a polished final product.
Major DAW manufacturers release updates and new versions regularly, often introducing new features, improved performance, and enhanced compatibility with the latest hardware and operating systems.
For instance, Steinberg’s Cubase now includes an overhauled MixConsole, and PreSonus’s Studio One 6.5 has added Dolby Atmos support and a new ‘DAWproject’ file format.
Mastering the required standards using a DAW ensures optimal sound quality across various playback systems before projects are exported and shared. Magix Sequoia is highly respected for its ability to master finished recordings. It is particularly renowned for its unmatched classical music editing capabilities.
Selecting the Best DAW for Your Needs ->
Equipped with a comprehensive understanding of DAW capabilities, the question arises: which one is the best fit for you?
The answer depends on a variety of factors, from your music production goals and preferred genre to your budget. Let’s delve into each of these considerations to help you make an informed choice.
Identifying Your Music Production Goals
Identifying your music production goals is a critical step before choosing a DAW.
Are you intending to create multi-layered electronic music or do you simply need straightforward audio recording capabilities? The DAW you choose should match your creative aspirations and provide the specific features you need for your projects.
For instance, if you’re a songwriter who needs a DAW for basic recording and mixing, a straightforward and intuitive DAW like GarageBand might be the perfect fit.
On the other hand, if you’re an electronic music producer who relies heavily on MIDI sequencing and sound design, a more feature-rich DAW like Steinberg Cubase, Ableton Live, or FL Studio would be more suitable.
Also, consider the type of hardware you own, as some DAWs may offer enhanced integration with specific hardware.
Evaluating DAW Software Based on Genre Specialization
Owing to their distinct features and workflows, different DAWs are suited to different genres.
This makes the genre a vital factor to consider when choosing a DAW. For instance, Steinberg Cubase is favored by electronic music producers for creating beats and dance tracks, while Logic and Pro Tools are preferred for metal music production due to advanced recording and workflow features.
Hip-hop producers may opt for Logic Pro X on Mac with its step sequencer and live loop features, or Reason Studios for its rack-based workflow and powerful samplers and drum machines.
Every genre has unique production requirements, and the DAW you choose should cater to these needs for optimal results.
It’s also worth noting that some DAWs have recently added new features to cater to specific genres. For example, Steinberg Cubase has expanded to include features like:
- Dolby Atmos Support
- Sample Tracks
- Beat Making via Groove Agent
- Advanced Scoring Editing and Orchestral Instruments Integrations
Considering Budget and Free Versions
Finally, considering your budget is an essential part of selecting a DAW.
DAW software options cover a spectrum from completely free to professional-grade platforms, with some offering tier-based pricing and others adopting a subscription model for their services.
Therefore, it’s essential to consider a DAW that fits your budget without compromising on the features you need.
There are several free DAWs available that offer extensive features for music production.
For instance, Waveform Free and Cakewalk by BandLab are top free DAWs, and others like Ardour provide access through a compilation from a source, a one-time donation, or a subscription model.
Budget-minded users should also assess a DAW’s system requirements for compatibility and consider software with a clear upgrade path.
This allows you to expand features as your experience and needs grow. If you’re a beginner, non-professional DAW software with a simpler feature set can be a suitable starting point.
Transitioning Between DAWs: Importing and Exporting Projects ->
Delving deeper into music production, you might need to switch between different DAWs, either for collaboration with another artist or to meet your evolving needs.
This process involves importing and exporting projects, which can be tricky due to compatibility issues between different DAWs.
Let’s explore how to navigate these challenges.
Project Compatibility Across Different DAWs
When moving projects between different DAWs for collaboration, awareness of differences in plugin protocols, audio, and MIDI routing, and unique features that affect compatibility is crucial.
MIDI files, which carry standard MIDI information, are typically the simplest to export and import between DAWs as the format is universally compatible.
To transfer audio tracks effectively between DAWs, it’s common to:
- Bounce each track to a continuous audio file, starting at the same point.
- Use time-stamped broadcast wave files to aid in the automatic alignment of the timeline.
- Consider using the Open Media Framework (OMF) protocol to transfer audio clips, but note that it may not always carry over automation or plugin effects.
- Choose compatible audio formats, bit depths, and sample rates for your audio files.
Lastly, files should be organized into folders by instrument type and compressed to reduce size for easier transfer and management.
When sharing or collaborating, It’s always helpful to include specific details about your project, such as the key and BPM (beats per minute) and any other relevant info about the project.
Collaborating with Others Using Various DAWs
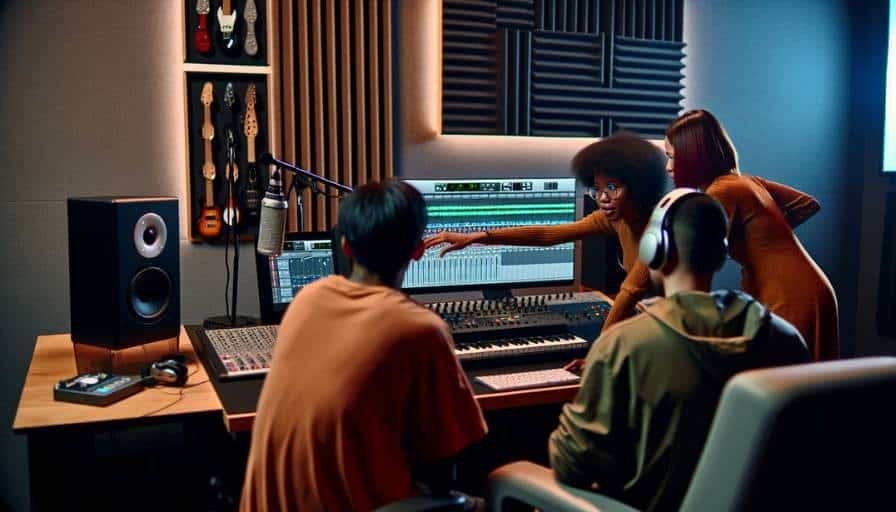
In our interconnected world today, collaboration holds paramount importance.
Whether you’re working with a vocalist across the globe or sharing your project with a mixing engineer, DAWs have made remote collaboration easier than ever. Collaboration tools within DAWs and integration with cloud services are growing trends.
These enable artists and producers to work together in real-time from different locations and access projects from any location or device.
Tools like SSL’s Pro Convert software and DISCO facilitate the transfer of projects between DAWs. These tools convert file formats appropriately and share music files with complete metadata.
However, before exporting and sharing projects, it’s crucial to secure the necessary permissions and protect intellectual property. Maintaining the integrity of a project when transferring between DAWs can be achieved by saving and reloading presets for plugins, transferring samples, and being mindful of details like audio clip alignment when using OMF files.
From Studio to Stage: DAWs in Live Performance ->
The capabilities of DAWs transcend beyond studio confines.
They’re also being increasingly used in live performances, allowing artists to bring their studio productions to life on stage.
Let’s explore how DAWs are configured for live use and how they can enhance live performances.
Configuring a DAW for Live Use
Designed for live stage performances, DAWs like Steinberg VST Live, and Ableton Live offer distinct capabilities for real-time audio manipulation and performance. MIDI control integration with DAWs allows for dynamic and nuanced manipulation during live performances, providing artists with the versatility for spontaneous creativity.
Setting up templates with pre-configured tracks, instruments, and effects enables performers to smoothly transition between songs or sets without interruption.
Therefore, whether you’re a DJ spinning electronic beats or a guitarist triggering backing tracks, configuring your DAW for live use can elevate your stage performance.
Enhancing Live Shows with DAW Software
The function of DAWs is not confined to playing backtracks on stage. They can also be used to enhance live performances in a myriad of ways.
Features like loop-based and clip launching in DAWs are key for triggering audio clips and loops during live performances. These features enable artists to compose and improvise on the fly, making each live performance dynamic and unique.
Artists can trigger loops, apply effects, and manipulate samples on the fly during live performances with performance-focused DAWs.
As a result, DAWs provide artists with a digital canvas to paint sonic landscapes in real time, adding an extra dimension to live performances.
The Evolution of DAWs: Looking Back and Ahead ->
Like all technologies, DAWs have evolved over the years, meeting the changing needs of musicians and producers.
As we look back at the history of DAWs, we also glimpse into the future, predicting the trends and advancements that lie ahead.
The Past: From Basic Functions to Full-Fledged Studios
From their humble beginnings, DAWs have made great strides.
What started as simple drum machines and sequencers have evolved into full-featured studios that reside within our computers. For instance, Fruity Loops, which started as a simple drum machine, has evolved into the full-featured Digital Audio Workstation known as FL Studio.
Other famous DAW packages include Cubase, Logic Pro, and Pro Tools which have grown to offer a variety of specialized functions for different genres and production needs.
These advancements reflect the relentless innovation in the field of music technology, transforming the way music is created and experienced.
The Future: Predictions for DAW Development
Looking ahead, DAWs are set to continue evolving, spurred by technological advancements and shifting user demands.
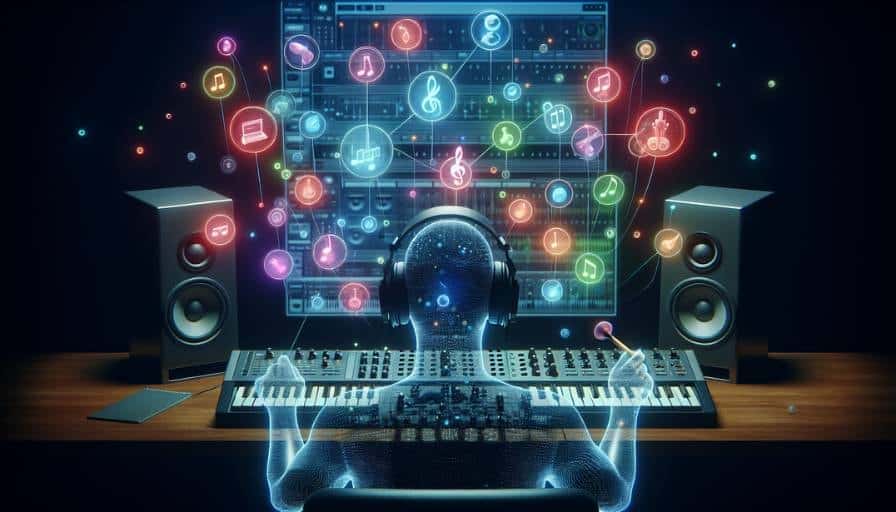
One such advancement is the integration of artificial intelligence into music production. Generative artificial intelligence is contributing to the development of Generative Audio Workstations (GAWs), offering features such as AI-assisted MIDI song generation, composition assistance, and generative vocal synthesis.
The DAW software market is anticipated to experience significant growth, influenced by technological advances and changes in user demands, with new market segments and expansion opportunities emerging.
Strategic positioning and creative thinking by market participants will become increasingly important to achieve a competitive edge in the dynamically evolving DAW landscape.
The future of music production promises to be an exciting one, with DAWs continuing to play a central role.
Navigating the DAW Marketplace: Latest Version Updates and Trends ->
Finally, let’s navigate the bustling DAW marketplace.
With regular version updates and evolving trends, staying up-to-date with the latest developments in DAW software can be a daunting task.
However, being aware of these updates can help you get the most out of your DAW and stay ahead of the curve.
Keeping Up with the Latest Version Releases
Staying updated with DAW revisions ensures access to the latest tools and bug fixes, maintaining software stability and efficiency for music production.
Major DAW manufacturers release updates and new versions regularly, often introducing new features, improved performance, and enhanced compatibility with the latest hardware and operating systems.
For example, Steinberg’s Cubase now includes an overhauled MixConsole, and PreSonus’s Studio One 6.5 has added Dolby Atmos support and a new ‘DAWproject’ file format. These updates illustrate the ongoing commitment of DAW manufacturers to refine and enhance their software in response to user feedback and technological advancements.
So, regularly updating your DAW is crucial for achieving optimal performance and accessing the latest features (nothing new here uh 😁 ?).
Trending Features in Modern DAWs
Continuing to evolve, DAWs are integrating new features that mirror the latest trends in music production.
One such trend is support for immersive audio formats like surround sound and Dolby Atmos. These technologies provide a more immersive listening experience by creating a three-dimensional sound field around the listener.
Steinberg Cubase and PreSonus Studio One 6.5 now include Dolby Atmos Mixing and rendering, making spatial audio mixing accessible to more users.
Similarly, other DAWs are also incorporating support for Dolby Atmos and binaural sound, indicating a trend towards the production of spatial audio content.
As these trends continue to evolve, staying informed about the latest features can help you stay ahead of the curve and make the most of your DAW.
Summary
In conclusion, Digital Audio Workstations have revolutionized the music production landscape, transforming the way we create and experience music.
From their role in recording and editing audio to facilitating live performances, DAWs have become an indispensable tool for musicians and producers.
As they continue to evolve, including advanced features and supporting diverse musical genres, DAWs promise to push the boundaries of music production into exciting new territories.
So, whether you’re a budding artist or a seasoned producer, jumpstart your musical journey with a DAW, and let your creativity run wild.
Worried that using a DAW is too complicated? HTMEM courses are here to guide you step-by-step, making it easy and approachable. Check them out here.

Frequently Asked Questions
What are the most popular DAWs?
The most popular DAWs for music production are Steinberg Cubase, Ableton Live, Logic Pro X, Pro Tools, FL Studio, and Soundtrap. Each has its strengths and features to consider.
Is there a completely free DAW?
Yes, there are completely free DAW options available, such as Audacity, Ocenaudio, Waveform Free, and Cakewalk by BandLab. These DAWs offer a wide range of features and are suitable for both professional and beginner audio producers.
What is the best DAW for beginners?
For beginners, Steinberg Cubase and Ableton Live are widely regarded as the best DAW, closely followed by Apple Logic Pro. All options offer user-friendly interfaces and comprehensive features to kickstart your music production journey.
What is a Digital Audio Workstation (DAW)?
A Digital Audio Workstation (DAW) is a software application used for recording, editing, and producing music on a computer, offering features such as multitrack recording and virtual instruments.
What are the core components of a DAW?
The core components of a DAW are the user interface, audio and MIDI tracks, and mixing tools and effects. These components are essential for recording, sequencing, and processing music.
Suggested Readings:
Explore Top Free Sounds for Music: Enhance Your Audio Creativity
The Ultimate Guide to Audio Engineering – Unleash Your Sound Potential
Hey DJ: Learn How Can You Mix Music Like a Pro
Now Practice and Enjoy!