Introduction to Low-Noise Recording
Hey, let’s cut through the noise here (pun totally intended). Getting crystal-clear sound in your productions isn’t rocket science; it’s about having the right gear that doesn’t mess up your signal with a bunch of unwanted hiss.
A solid audio interface is non-negotiable if you want to capture pristine audio without all the garbage. And trust me, understanding what makes these boxes tick will save you from dropping cash on something that’ll collect dust in six months.
The whole signal chain matters: from input gain to dynamic range—and it’s gonna make or break your sound.
And, reliable information from manufacturers can help you choose the right gear.

Understanding Audio Interfaces
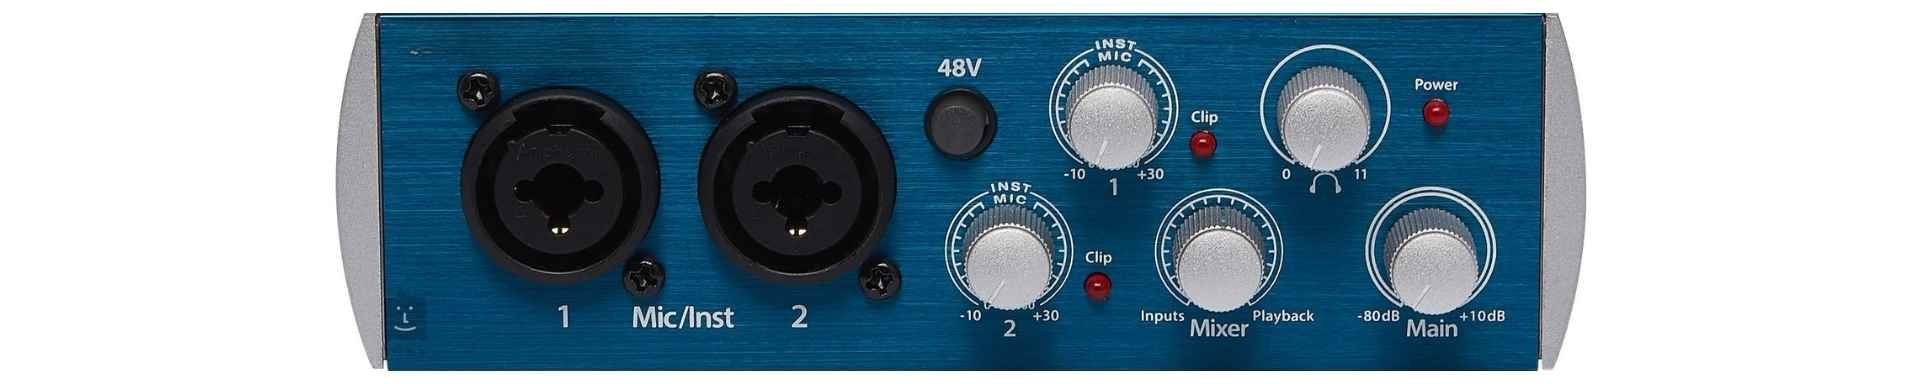
An audio interface is basically the middleman between your musical genius and your computer.
It’s the handshake that lets everything talk to each other. Most come packed with inputs for mics, instruments, and headphone outs that let you monitor without lag. Here’s the thing, though: the quality of those preamps and the overall build aren’t created equal.
Some are Ferrari-level clean, others are more like that beater car your cousin’s still driving from 1993. When you’re shopping, think about how many ins and outs you actually need, including the number of analogue outputs available for connecting to studio monitors and other audio equipment, and whether USB is fine or if you need something beefier like Thunderbolt.
Key Features to Consider
Getting your gain staging right is absolutely crucial. It’s like the foundation of a house. Mess that up, and everything else falls apart. The dynamic range determines whether your interface can handle both whisper-quiet passages and those moments when everything hits at once without falling apart.
And don’t sleep on the headphone output—especially if you’re in a bedroom studio situation where monitors aren’t always an option. Sure, some interfaces come with bells and whistles like built-in reverb and EQ, but ask yourself if you’re actually gonna use that stuff or if it’s just marketing fluff.
Some users might prefer features like built-in reverb and EQ, while others might not find them necessary.
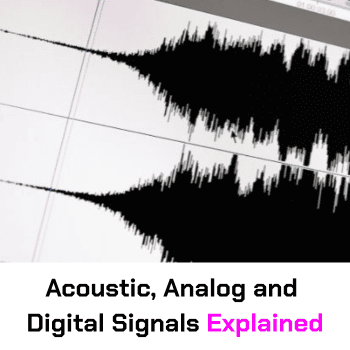
Tired of getting lost in the audio quality rabbit hole? Signal to Noise Ratio and Dynamic Range don’t have to be mysteries wrapped in technical jargon. Grab the free Acoustic Analog and Digital Signals Free eBook and level up your sound game without drowning in snake oil explanations or content slop.
Minimizing Noise Floor
The noise floor is your enemy, and proper gain staging is your weapon.
Users might not notice certain noise issues if proper gain staging is applied. Getting that input gain dialed just right and pairing it with a mic that doesn’t sound like you’re recording through a tin can telephone will make a massive difference. Y
eah, noise reduction plugins can help in a pinch, but they’re more like band-aids than solutions. Use them too heavily, and suddenly your hi-hats sound like they’re underwater. And for the love of good sound, clean your gear occasionally.
Dust and grime aren’t doing your signal any favors.

Types of Audio Interfaces
The market’s flooded with options.
USB interfaces for the budget-conscious, Thunderbolt for the speed freaks, and PCI for those still rocking desktop setups.
Each has its own vibe.
USB is perfect if you want something that just works without breaking the bank. Thunderbolt is the move if latency makes you lose your mind and you need everything yesterday. Before dropping cash, double-check that whatever you’re eyeing actually plays nice with your computer setup.
Nothing worse than unboxing your new toy only to realize your laptop doesn’t have the right ports.
Why Choose a Low-Noise Audio Interface
When it comes to recording high-quality audio, a low-noise audio interface is your best friend. Noise can be a major issue in audio recordings, and once it’s captured, it’s a nightmare to remove. A low-noise audio interface helps to minimize the amount of unwanted noise introduced into your signal chain, resulting in cleaner and more professional-sounding recordings.
This is especially crucial in a home studio environment, where noise from other devices and sources can easily creep into your audio. By choosing a low-noise audio interface, you’re not just getting rid of hiss and hum—you’re also gaining a wider dynamic range.
This means you can capture a greater range of tones and nuances, making your recordings sound richer and more detailed. So, if you want your audio to be free from unwanted noise and full of life, investing in a low-noise audio interface is a no-brainer.
Audio Interfaces for Specific Needs
Not all interfaces are created equal: some are built specifically with guitarists in mind, others cater to the vocal-heavy crowd, and some are designed to capture a full drum kit without breaking a sweat.
The bedroom producer has different needs than someone recording a live band in a professional studio. If you’re mainly laying down guitar tracks, look for something with solid instrument inputs and maybe some amp sim action.
Know your needs before you buy, or you’ll end up with gear that doesn’t serve your actual workflow.
Evaluating Audio Interfaces
When you’re comparing interfaces, three things matter:
- How clean it sounds
- What features are you actually getting
- and whether the price makes sense for what’s in the box.
Don’t just take the manufacturer’s word for it. Dig into reviews from actual users who aren’t getting paid to gush. Better yet, test it yourself with your exact setup (if possible).
And think beyond the immediate. What’s the warranty situation? Is the company known for abandoning drivers for older gear, or do they keep things updated?
These details matter in the long run. Understand the warranty details and compare prices before making a purchase to ensure you make an informed decision.
Recommended Audio Interfaces

1. Focusrite Scarlett 2i2 (3rd Gen)
- Price: Approximately $160
- SNR: 110 dB
- Pros: Clean-as-a-whistle preamps, modern USB-C connection, fits practically anywhere. Independent volume controls for headphone monitoring ensure precise control over headphone volume.
- Cons: Just two inputs (hope you weren’t planning to mic a drum kit), no MIDI ports for your synth collection.

2. Universal Audio Apollo Twin X
- Price: Around $899
- SNR: 127 dB
- Pros: Thunderbolt 3 speed demons, built like a tank, sounds expensive because it is.
- Cons: Costs about as much as your rent, requires a Thunderbolt 3 port (sorry, older Mac users). While the Apollo Twin X offers superior processing power and sound quality, there are cheaper alternatives available for those on a tight budget.
3. PreSonus AudioBox USB 96
- Price: About $99
- SNR: 102 dB
- Pros: A cheap option that won’t empty your wallet, tough enough to survive your next tour, and plays nice with pretty much any DAW.
- Cons: Pretty basic feature set, noise floor isn’t quite as low as the premium options.

4. Behringer UMC22
- Price: Around $60
- SNR: 100 dB
- Pros: Extremely affordable, perfect for beginners and small home studios. The UMC22 offers impressive sound quality for its price range and includes a MIDAS preamp for clean audio capture.
- Cons: Limited to two inputs, lacks advanced features like MIDI connectivity and high sample rates.

5. RME Babyface Pro FS
- Price: Approximately $899
- SNR: 115 dB
- Pros: Compact design with professional-grade sound quality, high dynamic range, and low latency performance. The Babyface Pro FS boasts a robust build and is packed with features like multiple inputs and outputs and a powerful headphone output.
- Cons: High price point may not be suitable for beginners or budget-conscious users, requires a USB 2.0 connection.

6. Audient iD4 MKII
- Price: About $199
- SNR: 119 dB
- Pros: High-quality preamps and converters, sleek design, and intuitive user interface. The iD4 MKII is ideal for solo musicians and podcasters, offering a large volume knob for easy control and a JFET DI input for guitars.
- Cons: Limited to two inputs, may not be sufficient for larger recording setups that require more channels.
Setting Up Your Audio Interface
Getting your interface up and running isn’t brain surgery, but skipping steps will come back to bite you. Hook it up to your computer, install whatever drivers it needs (yes, even if you think you don’t need them), and get the companion software sorted.
Make sure to install the companion app for optimal setup and functionality, as it can facilitate user-friendly setup and provide convenient access to firmware updates and feature controls.
Take a few minutes to actually dial in those gain levels and headphone output. It’s amazing how many people skip this crucial step. Then test it with your actual workflow before you start that massive recording project.
Trust me, troubleshooting mid-session is a creativity killer.
Using Your Audio Interface with Instruments
Plugging instruments directly into your interface requires some know-how if you don’t want everything sounding thin and lifeless.
Having multiple channels is crucial for recording different instruments, especially in multi-mic setups like drumming. Get yourself a proper cable (not that $5 one from the gas station), and spend some time finding the sweet spot for your input gain.
A good DI box can work wonders for certain instruments, and don’t be afraid to experiment with amp sims if you’re going direct. Every instrument has its own personality: what works for your Strat might not work for your jazz bass.
Using Your Audio Interface with Microphones
Using your audio interface with microphones is a surefire way to capture high-quality audio. Most interfaces come equipped with multiple inputs, including XLR and 1/4-inch connections, allowing you to connect a variety of microphones and other devices.
When using a microphone with your audio interface, it’s essential to adjust the input gain to optimize the signal. This helps prevent distortion and ensures that your audio is captured at the highest possible quality. Many audio interfaces also feature built-in preamps, which can boost the signal from your microphone and provide a cleaner sound.
By using your audio interface with a microphone, you can capture a wide range of sounds, from vocals and guitars to drums and other instruments.
For example, a condenser microphone can capture the subtle nuances of a vocal performance, while a dynamic microphone can handle the high energy of a live drum performance.
So, whether you’re recording a delicate acoustic guitar or a thunderous drum kit, your audio interface has got you covered.

Advanced Audio Interface Topics
Once you’ve got the basics down, there’s a whole world of signal processing and effects that can take your recordings from bedroom demo to radio-ready. To achieve this, consider an upgrade to your setup with advanced signal processing and effects.
Plugins are your friends here: find a reverb that doesn’t sound like you’re in a tin can, a delay that sits right in the mix, and EQ that lets you carve out space for every element. If you’ve got the budget, interfaces with built-in DSP can take some processing load off your computer.
And don’t get caught in the analog vs. digital debate: both have their place, and the best producers know when to use each.
Maintenance and Care
Your gear needs love if you want it to keep loving you back. Using tested and reliable gear is crucial for consistent performance. Clean those knobs and faders regularly (dust is the silent killer), keep your drivers and software current, and don’t skimp on cables—they’re the veins of your studio.
TIP: Store your interface somewhere that isn’t damp or baking in direct sunlight. It’s amazing how many audio problems can be traced back to basic maintenance issues that nobody wants to talk about because it’s not as sexy as buying new gear.
Common Issues and Troubleshooting
When things go sideways (and they will), start by checking the simple stuff.
Conducting thorough tests can help identify and resolve issues early on. Is everything actually plugged in? Is your gain staging causing clipping? Are your cables on their last legs?
Sometimes a noise reduction plugin can help, but it’s usually better to fix issues at the source.
When all else fails, the manufacturer’s support forums are goldmines of fixes for common problems. Don’t be the person who returns perfectly good gear because you didn’t RTFM (read the freaking manual).
Glossary of Key Terms
- Audio Interface: A device that connects your musical instruments or microphones to your computer, allowing you to record and play back high-quality audio.
- Input Gain: The level of amplification applied to an audio signal as it enters an audio interface or other device.
- Noise Floor: The level of background noise present in an audio signal, which can be introduced by the audio interface, microphones, or other devices in the signal chain.
- Analog Input: A connection on an audio interface that allows you to connect analog devices, such as microphones or instruments, to your computer.
- Signal Chain: The path that an audio signal follows as it passes through various devices, including microphones, audio interfaces, and software.
- Dynamic Range: The range of tones and volumes that an audio interface or other device can capture, from the quietest whispers to the loudest sounds.
- Headphone Output: A connection on an audio interface that allows you to connect headphones, providing a convenient way to monitor your audio.
- Gain Staging: The process of adjusting the input gain and output levels of an audio interface or other device to optimize the signal and prevent distortion.
- High Gain: A high level of amplification applied to an audio signal, which can be useful for capturing quiet sounds but can also introduce noise and distortion.
- Home Studio: A recording studio set up in a home or other non-professional environment, which can be prone to noise and other issues that can affect audio quality.
- Preamps: Devices that boost the signal from a microphone or instrument, providing a cleaner and more robust sound.
- USB: A common connection type used by many audio interfaces, which provides a convenient and high-speed connection to your computer.

Conclusion and Recommendation
Bottom line: finding your perfect low-noise audio interface isn’t about chasing specs in a vacuum: it’s about matching the right tool to your specific needs. Think about what you’re actually recording, what connections your setup requires, and yes, what your budget can handle.
Read real-world reviews, not just marketing hype.
And most importantly, test before you commit, if possible. Your interface is the gateway for everything you create. Choose wisely, and your future self will thank you when you’re not fighting noise and distortion issues when inspiration strikes.
Suggested Reading
Which Scarlett Interface Should I Buy?
Practice and Enjoy!